Showing posts with label Savage Worlds. Show all posts

Friday, 1 May 2015

Planetcrawl: editing the planetary 3D map during the campaign

THIS ARTICLE IS OBSOLETE. THERE IS NOW A FREE VIEWER TO SEE YOUR TRAVELLER STYLE MAPS ON A GLOBE. USABLE ON PHONE, TABLET AND COMPUTER.
THE NEW ARTICLE IS AVAILABLE HERE :


Now that we have found a way to create easily 3D planet maps with hexes, maybe we should give a little more attention to tools that could help us to run our planetcrawl.

And the first one is how we can display new informations on the map, or even edit the map as a consequence of the actions or discoveries of the characters.


Sketchup floating labels
The easiest way is to add a floating label that points directly to the place that you want to mark. The advantage is that you can add as much text you want into it. The drawback is that if you have too much of those labels, they are going to make the planet map very confusing.
Anyway, they are easy to make:

-Choose the label tool
-Click on a point on the map and extend the label to its position
-Fill the text in the label


Editing the map
It is also possible to draw directly on the texture map that covers our 3D planet model. Indeed, Sketchup has a function just for that.

-step 0: before being able to use that function, you need to have a graphic program linked to Sketchup:
              -Preferences>Applications and choose a graphic application like GIMP or Photoshop

Now, you can edit your map, from Sketchup, on the fly:

-step 1: right click on a face of the 3D map, choose texture>edit texture image and it should open in the program chosen in step 1.
-step 2: make the modifications to your map in your graphic program. Hint: if you are making a change on your map because the players have discovered that their map was inaccurate (there is a city where their map indicated a forest), a simple copy and paste from another hex is quick enough.
-step 3: Flatten the image and close it. When the program asks to save the changes, click yes.

Given the size of the mapping texture, it won't be possible to add many informations onto the hexes. At best a symbol of two or an index indication directing to a note in your scenario.

But, whatever solution you use, it won't be possible to map the planetary 3D model with the details that could be needed once our characters are on the ground.


So, we are going to need sub maps for zooming in on the area covered by one hex of our planet (only those with interest, that need some focus, of course). But as soon as we do it, we are into known territory: the classic hexcrawl that we have known and practiced before.
You'll find a lot of advice by reading the articles about hexcrawls that were posted on The Alexandrian blog, more to the point that I could hope to write.
Anyway, to map those hexes, you can go back to Hexographer, Tiled (a post about that wonderful program is long overdue) or sketch them on paper.


Sunday, 11 January 2015

Planetcrawl with an easier way to make 3D Traveller style world maps

THIS ARTICLE IS OBSOLETE. THERE IS NOW A FREE VIEWER TO SEE YOUR TRAVELLER STYLE MAPS ON A GLOBE. USABLE ON PHONE, TABLET AND COMPUTER.
THE NEW ARTICLE IS AVAILABLE HERE :


Some times ago, I did show a way to turn the kind of planetary maps familiar to Traveller gamers into 3D views for the enjoyment of your players.

Whilst not very complicated, it involved the cutting and pasting of every face into the model, one by one, twenty of them....
It was not a very bright solution.... It can be made in one step....Sorry.

So, here is a new way to turn your planet maps into a 3D model that your players can look around to observe the geography of their destination. But now, it can be made in less than five minutes.

Observant readers will notice that I have also modified the presentation of the result, so that now, it avoids giving the impression that planets are D20 in space but show the model as a simplified 3D representation destined to give only the pertinent information about a planet to an overburdened space crew.


PART ONE: PREPARING THE FLAT MAP
- Open the Icosahedral Worldmap Generator from Inkwell, the makers of Hexographer (free to download HERE)
- Generate or draw your map. You can generate a map or place yourself all the hexes you want. The best idea is probably to generate the map and change the parts you want to make specifically to fit your scenario. Take care to choose the number of hexes of a mapside, depending on the size of the planet. Export the map as png.
Click the image to see full size
- Open the png in GIMP (free to download HERE)
- Crop: as you can see, there is a grey area, extending around the map itself. Select the map itself with select rectangle tool and then crop to the selected area.
Click the image to see full size
- Resize: Our cropped map must be exactly 1500 x 709 pixels, so resize it to that size. Disable the automatic Keep Proportions.

- (Optional) Heal: whilst we have cropped out the exterior grey area, there are still grey triangles area between the triangle faces of our map. Those areas won't show on the 3D map, so we could keep them. Still sometimes they can appear as fine lines between faces of our 3D maps. It is easy to get rid of them to have perfect matches faces on our 3D maps. Select those grey triangle and apply the heal selection filter.
Click the image to see full size
Above is the healed view of the map. As you see, GIMP added parts where the map was plain grey. This is unimportant, because those part won't show on the 3D map. What is important is that the colors have been extended from the map boundaries, meaning that there won't be grey visible on the 3D map.

- (Optional) Add features to your map: of course, whilst you are in GIMP, you can add some special features on your maps (text or wathever).

- Export as png.

PART TWO: FROM 2D TO 3D

- Open Sketchup (download for free HERE) The free version is the one called Sketchup Make.
- Open the blank planet map (download it HERE)
- Replace the blank texture with the planet map you designed in part one. For that, do the following:

Open the texture window (bucket tool and clicking the brick on the choices on the upper part of the panel) and double click on the empty planet texture (the one with the letters) to open the panel completely.
Click the image to see full size
Go to the texture menu in the lower part of the window and choose Load. Navigate then to your planetary map and choose it. It is done.
Click the image to see full size
- (Optional) Add 3D labels to your map (like those moving around on the above animated gif)
- Save your file

Your players can now view and manipulate the map within the Sketchup viewer (freely available HERE), without any risk to modify it. Basically, they should simply click the tabs at the top of the page, but they can also use the normal sketchup manipulating tools. They can always come back to the normal views by clicking a tab anyway.

Five minutes flat for a planetary map, which means that a full subsector can be mapped in 3D in one hour. Meaning also that with just a little more work and then...

How about playing a planetcrawl or even a spacecrawl or sectorcrawl? It wouldn't be very complicated....

A few encounters tables by terrain types common on all the planets (spaceports, imperial cities,...), a few encounters tables for terrain types specific for a planet (natives cities, wilderness,..) and a few hexes with prepared places that the players are searching for or containing the stuff that every adventurers are wishing to find (a crashed spaceship, the ruins of a pre-imperial civilization, a research station which doesn't emit anymore, the hideout of the scientific madman, the secret base where the Zorgs are keeping the space Princess captive,...). Don't forget to add trading and adventures opportunities, here and there.

Try to alternate civilized, populated planets and barren unexplored ones. Keep space communications limited by light speed whilst space travel is through space wrap, meaning that if you want to know something, you'd better go and see for yourself.  Space travel should be more like pirates ocean going than 21th century communications.
Make even wrap travel slow enough to give a strong feeling of navigating among an ocean of stars separated by gulfs of blackness. 
Add misjump possibilities, just for the look on the player's face when they appear in a system swarming with Zorgs warships where nothing have been reported before.

And, of course, all this should happen on a frontier sector, where most of the universe is still mysterious and largely unexplored.

But, mostly, give the characters reasons to move and to search; either to find something or someone or solve some mysteries; and/or to flee from someone or something. This is pulps space! Have action!

First choice to use those ideas would be CLASSIC TRAVELLER (just the black books 1, 2 and 3), of course. After all they are rules that were designed to be able to play in any scifi setting. The imperial background channeled the game in another direction, but is, after all,  a later addition.

Wouldn't a game like  X-PLORERS also perfectly fit this mood? It is a wonderful old school scifi game. It shall give you all you need for the kind of campaign described above. ....  You could also use other games with the right state of mind: STAR ACE, STAR FRONTIERS, SAVAGE WORLDS TALES OF THE SPACE PRINCESSOr also, STAR EXPLORERSSTARSHIPS & SPACEMEN 1st or 2nd Edition for a Star Trek feeling, which, of course blends quite well with a planetcrawl game. Ou enfin, en français EMPIRE GALACTIQUE (la première édition seulement, la seconde ne tenant pas vraiment la route).

Now is the time for retroscifi planetcrawl. Time to dust off your Poul Anderson and Edmund Hamilton novels. Grab you blaster, fire the engines of your old trusty modified Trader smuggler spaceship and go save a Space Princess.


Sunday, 11 August 2013

3D Traveller style planets maps for space opera games with Hexographer and Sketchup

THIS ARTICLE IS OBSOLETE. THERE IS NOW A FREE VIEWER TO SEE YOUR TRAVELLER STYLE MAPS ON A GLOBE. USABLE ON PHONE, TABLET AND COMPUTER.
THE NEW ARTICLE IS AVAILABLE HERE :


For me, one of the most enjoyable parts of mastering a space opera game, has always been the mapping part. I have always loved the idea of making the planetary maps on the icosahedron projection that was used in RPGs since Traveller. Like that one:


(this map comes from the Hexographer free map generator, read further)

Whilst I make with great care the maps that are required for the scenario, I have always needed more maps than those. Indeed, the players are bent to wander around and, after all, one of the attraction of space opera is the possibility to travel around in an almost limitless setting.

So, I also need to be able to populate parts of the setting that are not vital for the scenario. It is quite easy as far as stats are concerned (all rulesets have generation systems for sectors, stars and planets), but it can be very time consuming if you want to map all those planets, or even some of them.

That's where Hexographer comes in. It is a simple mapping program that lets you make normal maps. And, if you have never heard about it, you should have a look, it can make your life as a GM much easier.

But it also has a setting for icosahedral maps. And what is even more interesting, it can also generate maps from a few chpices (hydrography, mountain ranges,...) which are the kind of informations that your game system and scenario has normally provided. And then it lets you customize the generated result.

But it is even better: there is a free version here that is limited to planetary maps. It should be enough for what we are speaking about here, though I would advise you to buy the full version, it is not expensive and you won't regret it: it will give you access to other mapping functions, styles,...

Anyway, download it, open it and generate a few maps, it is fun and even addictive.

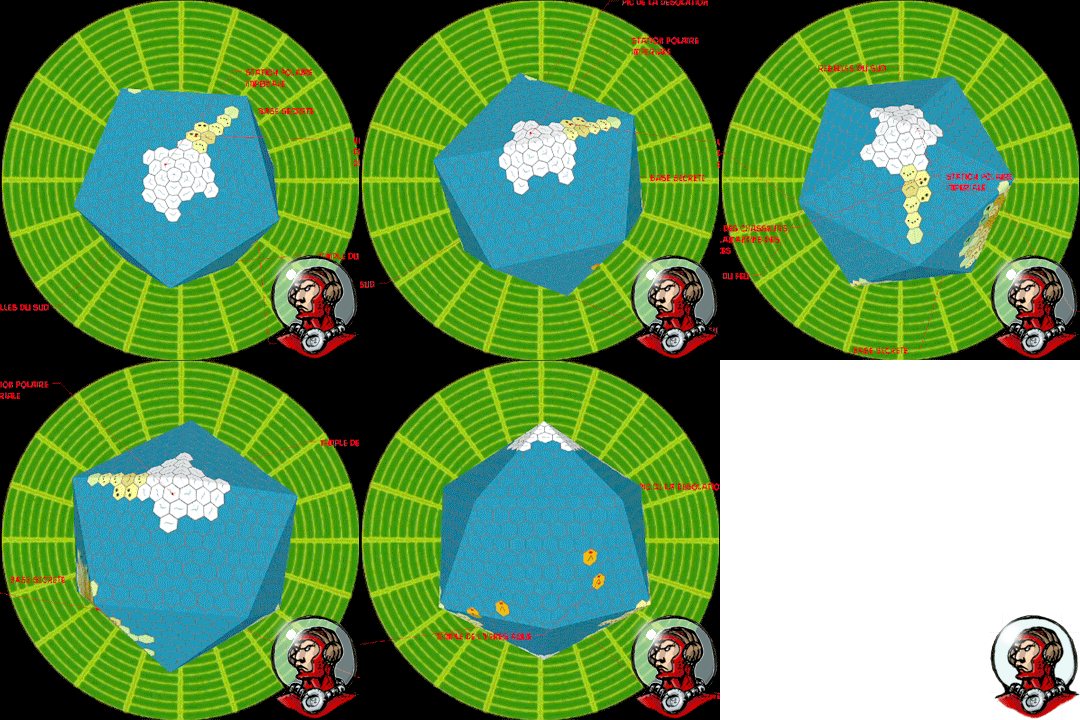
But, why stop there? Why not present those maps in a 3D way? Like this one:


This is simply the map shown above turned into a 3D view.

First, you'll need Sketchup to change the flat map into a 3D model. You can download it Here.

You'll also need the empty 3D model planet. It is a Sketchup skp file with empty faces, and you can download it Here.

Now, generate a map with Hexographer, we are going to turn it into a 3D planet.

Open the empty Sketchup planet file with Sketchup, it should look like this:


Click on the A1 Tab. Click once on the face that is in front of you to select it. Then, Right-click>Texture>Modify Image Texture.

The face A1 that you were facing should open itself in the graphic program that is associated with Sketchup (if no graphic program is associated with Sketchup, go to Preferences>Applications and choose one, something like Photoshop or GIMP would be perfect).

Now, open the map of the planet you generated with Hexographer and select the part corresponding to the A1 face, paste and resize it. Flatten the layers and save.
The new image should now be visible in Sketchup on the 3D map. And as there are twenty faces, yes, you'll have to do it twenty times (from A1 to C5).

To make it easier to select the part of the map associated with a face, here is a little sketch of them:


When you are finished, just save your Sketchup model.
You, of course,  can re-open it any time and make any  changes you want, using Sketchup.

But if you prefer that your players, whilst being able to see and manipulate the 3D map, are unable to make changes, let them open it using Sketchup Viewer, available Here.

Have fun.


Sunday, 24 June 2012

My Maptool framework for Savage Worlds (english version)

Maptool is a free Virtual Tabletop program. Basically it is a virtual tabletop intended for playing through internet. But it can be something else.

Contrary to what is usually put forward about the program ability to play through the net (and it is also true of other VTTs), Maptool is also (mainly?) a fabulous tool to play in "normal" face to face games with the players gathered around a table (and also to play by forums, but that's for another post).

Maptool is not specifically designed for one particular game (if you use it "out of the box", it is a simple whiteboard upon which you can move your game tokens). It is still possible to adapt Maptool for the game you play, and the way you play it, by developping a framework.

It is the framework that I have developped to play Savage Worlds with my gaming group that I intend to present here. Or, more precisely it is the english version of the framework I use in french.
Maptool can be downloaded here.
You'll find further explanations, ideas or solutions here.

First, I must stress that I use Maptool exclusively to play face to face games, with real players, and not to play online. I use Maptool as a display for my players and to record easily gaming stuff. You'll find a compleat explanation about the setup I use here, but, basically, it is simply a computer with a second screen attached to it.

The framework (meaning all the automated functions I have programmed) is the result of that way to use Maptool; and, a lot of things that could have been added or programmed for gaming online (like dice throws for exemple) are done around the table and are not part of the framework.

If you prefer a more compleat and automated framework, you should download Savage Troll's framework which shall let you use much more features.

Here is what Maptool looks like when using my framework:


As you can see, selecting a token (or even just moving the mouse on it) shows the portrait associated to the token and reveals a small window with a few informations. The informations are going to be different if the token is a PC or a NPC. The map, shown on the right occupies the main part of the screen (you only see a fraction here, it goes further to the right). And there is a column on the left that can display the tokens and maps library or the Campaign Macros, by toggling the tabs at the bottom. It is all we are going to use.

We are going to review all those campaign macros.

Let us see what those controls do.


The first button (Character Sheet) reveals the character sheet associated with a token.


Here is, for exemple, the sheet of the character that was visible above:


The second control (Input) let you fill or modify the character sheet. After clicking the button, you can select different categories and fill or check the fields.

Content should be self explaining.


The next controls (Wounds, Fatigue, Power and Bennies) let you modify the character state by managing the values that can change during the game.


Increasing wounds and fatigue points can trigger the display of some states on the token (for exemple, a wildcard shall be "Out" after three wounds, whilst a non wild card shall be eliminated after just one,...). Moreover, malus from wounds and fatigue shall be displayednear the character's portrait.

But, to give the maximum of freedom to the GM, he can override those states and put them on or off with the next row of controls (States).


Here is what those states look like:


Out means that a wildcard has been put out of the fight through wounds or fatigue. It can also be attributed directly by the GM depending of what happens in the scenario (any reason for which a character, wildcard or not, should be inconscious or unable to take actions).


Death is displayed when a non wildcard character receives a wound. It can be activated by the GM depending on the results of wounds on a wildcard.


The Shaken state can be the result of different things in Savage Worlds. So, it is the GM who must handle it..


Next two controls, from the Appearance category let you play with the portrait, image or handout of a token (or object).
To understand what it is about, you must know that it is possible to associate three images with a token (or an object).
-the image, the token as it appears on the map
-the portrait that appears when you put your mouse on a token
-a handout, an image that you can show to give informations during the game (basically, it is used to show a handout carried by the token, hence the name).

The controls here let you change the category of those images to obtain effects during the game.

The first control of the row (Image), let you exchange the image of a token and its handout image. Not too useful for a character, but it enables you to give two images to an object and change from one to the other. For exemple, you can have a lorry with an outside image and an inside one showing its contents. The two images must have the same size.
The second control (Portrait) let you exchange the portrait and the handout of a token. It lets you change a character from a charming old lady into an horrible ghoul. Your players will love that. The two portraits must have the same size.

Next row of controls (Maps) let you manipulate the elements on the map.
Before anything else, always check the layer you are on, before selecting, moving or manipulating anything on the map. It shall save you a lot of frustating moments.


First control (O H) let the GM move a selected feature from the layer Objects to the layer Hidden, which makes it invisible to the players, but still visible to the GM. Doing it again shall make the reverse operation (from Hidden to Objects).

The second control (PCs) let the GM move all the tokens that are tagged as PCs, from the current map to another map.
Third control (Select) let the GM move all the selected tokens from the current map to another map.
The last two controls (Z- et Z+) enable you to change the position of elements stacked together and that are sometimes difficult to select or drag because they cover each others.
It also gives you the possibility to stack different parts of a structure (the decks of a ship for exemple) and go from one to the other.


The last row lets you associate some effects (lights or areas) to tokens on the map.
The first one (Areas) let you associate a template to a character or an object. Mostly useful for area effects like explosions.
The Lighting button lets you associate à kind of light to a character (you can see the torchlight effect above).
The X control removes the lights and areas associated with a token.


-Invisible-Players view-


-Invisible-GM view-

Controls Invis et Vis make a token respectively invisible or visible. On the player's screen the token disappear (or re-appear); on the GM's screen, the token receives a small mark (see above) to show the GM that the token is not visible to the PCs.

Finally, it is important to note that only the edges/hindrances/powers of the Savage Worlds Explorer's Edition are integrated in the framework.
So, if you must add edges/hindrances/powers from supplements or from your own worlds, you must add the new edge/hindrance/power
If, for exemple, you want to add something called Code of Honor, you must:

In the properties list:
- declare the new property:
exemple: CodeofHonor:0

- add it to the line of edges or hindrances or powers
exemple: [r: if( CodeofHonor>0, " Code of Honor", "")]

In the macros:
in the macro "Input", you must add it among the edges or hindrances or powers:
exemple: "CodeofHonor|" + CodeofHonor + "|Code of honor|CHECK",

That's all, you don't even have to understand how it works if you do it correctly (it should be entered as the others elements of the same category).
In the exemples above CodeofHonor is the name that Maptool shall use and Code of Honor is the name as it shall appear on the macros windows and on the character sheet.

Now, I just need to give you the link to the framework. Just open it in Maptool and you are ready.

Don't hesitate to change anything you want in the framework. Experiment. It is one of the pleasures of Maptool. And if you have any question, please ask, either here or on a forum.


Saturday, 17 March 2012

Don't drink the water-Part 3


And here is the third and last part of the elements needed to play "Don't drink the water" with Maptool.

You can download the maps, tokens and portraits here.

That one was a little more difficult to make because the village was more extensive than the parts needed for the first parts.
I made a few changes to the fort (not much) because I tought it made more sense tactically, and the houses are made separately, to be placed on the desert background.

From the description of the uniforms in the scenario, it seemed that the unit in the fort was the Contreguerilla from Colonel Dupin but with lances. I prefered to use line lancers (if only because I have other plans to use Dupin).

Smitework made an adaptation of the scenario to play with Fantasy Grounds. I don't know if it can use my maps or if it comes with its own, because, being on a Mac I can't use Fantasy Grounds. Anyway, if you are interested, you can find it here.

Friday, 2 March 2012

Savage Moleskine revisited

Some times ago, I explained how I was using my Moleskine notebook to prepare Savage Worlds game sessions. And I did post the index cards I am glueing in my notebook (but you can use them as normal index cards if you prefer).


But as I discovered recently the art of turning a form sheet into a fillable PDF, I have remade the index cards. You can now fill the pages on your computer, add a portrait or other images and then save or print them.

Note that to be able to record filled character sheets and add images on them, you shouldn't use Adobe Acrobat, but use instead Foxit (for PCs) or PDFsigner (for Macs).

Savage Worlds NPC moleskine sheet in english
Fiche de NPC moleskine pour Savage Worlds en français
Savage Worlds Vehicle moleskine sheet in english
Fiche de véhicule moleskine pour Savage Worlds en français.

Sunday, 12 February 2012

Don't drink the water-Part 2


Here is the second part of the maps and tokens destined to be used with the scenario "Don't drink the water" for Savage Worlds.
It contains a few tokens and a map of ruins in the desert (that can be used in almost any setting).
You can download it here.
Last part shall be, obviously, about the village of Bacoachi, its fort and its garrison.

Sunday, 29 January 2012

Don't drink the water-Part 1


Having some free hours this weekend, I begun photoshoping the stuff I need to play the scenario "Don't drink the water" for Savage Worlds. To avoid spoilers, let's just say that, at the beginning of the scenario, the characters can encounter the french foreign legion. So, you'll find here two maps, one with a trail in the desert and another with a small house used by the legionnaries as a post or bivouac. I have also included the image I am using for desert background. There are two tokens one of a legionnary private and one of a NCO. And, of course, there is the wagon (with and without canvas) used by the PCs. All the maps, tokens, etc... are made for being used in a VTT (Maptool for me) at 128 pixels/square. So if you use other sizes, you should probably rescale them. I use 128 px/square but I generally display the map at around 60-70%; this way, I can zoom in without losing too much quality. If you use the drawings here at under 50% (either by rescaling or zooming out) most details shall become too small and quality will suffer. I have tried to keep a consistent comics-like look for the maps, tokens and portraits. I hope you'll like it. Anyway, here is the zipped file. Part 2 shall be about juarists, a ruined abbey and some undeads.

Saturday, 7 January 2012

Mon framework Maptool pour Savage Worlds Explorer's Edition

Ce petit billet est rédigé en français. Il n'y aurait pas eu beaucoup de sens à rédiger en anglais la présentation et le mode d'emploi d'un framework qui est en français.

Maptool est un programme gratuit de Virtual Tabletop. En gros une table de jeu virtuelle destinée au jeu de rôle.
Notez bien que contrairement à l'accent qui est généralement mis sur l'usage en ligne de Maptool (et des programmes VTT en général), c'est aussi (surtout?) un outil fabuleux pour jouer de la façon "normale", en face à face, avec des joueurs réunis autour d'une table.

Maptool n'est, au départ, destiné à aucun jeu en particulier (si vous utilisez le programme tel quel, c'est juste une carte pour déplacer des pions). Il est cependant possible d'adapter précisément Maptool au jeu que vous utilisez, et à la pratique que vous en avez, en créant un framework.
C'est un framework que j'ai créé pour utiliser Savage Worlds dans mon groupe de jeu que je vous présente ici.
Maptool peut être téléchargé ici.
Vous trouverez des explications en français pour l'utilisation de Maptool ici.

Tout d'abord, il faut que je précise que j'utilise Maptool exclusivement pour jouer en face à face, avec des joueurs réels, et non pas pour mener des parties en ligne. Je me sers de Maptool pour montrer la situation à mes joueurs et pour enregistrer plus facilement les données du jeu.

Le framework (c-à-d l'ensemble des commandes automatisées que j'ai programmées) reflète donc cet usage; et, une série de choses qui pourraient être automatisées pour du jeu en ligne (par exemple le tirage de cartes d'initiative) se font dans mon groupe de façon normale.

Si vous préférez un framework plus automatisé, je vous recommande celui de Savage Troll qui vous permettra d'effectuer la quasi totalité des manipulations à l'écran.

Voilà à quoi ressemble l'écran de Maptool en utilisant mon framework (vous pourrez trouver les pions utilisés dans cet exemple sur le blog, et la carte utilisée est l'oeuvre de Billiam Bamble et est disponible ici):

Comme vous pouvez le voir, le fait de placer la souris sur un pion fait apparaitre une illustration et quelques informations. Le terrain du jeu (dont on ne voit qu'une fraction ici) occupe la quasi totalité de l'écran et une colonne sur la gauche reprend les boutons des macros permettant de gérer le jeu.

Voyons un peu à quoi servent ces différents boutons.


Le premier bouton (Fiche de personnage) permet de faire apparaitre la fiche de personnage du pion sélectionné. Voilà par exemple la fiche de personnage de la dame en rouge entraperçue un peu plus haut:

Le second bouton(Input) permet de remplir ou de modifier cette fiche de personnage. Après avoir cliqué sur le bouton, il suffit de parcourir les catégories dans la fenêtre qui s'ouvre alors, et de cocher ou remplir les différents champs qui se présentent.
Les boutons (Blessures, Fatigue, Pouvoir et Destin) suivants permettent de modifier l'état du personnage en gérant les caractéristiques qui évoluent durant le jeu.
Le fait d'augmenter les points de blessure ou de fatigue peut entrainer automatiquement l'affichage de certains effets sur les personnages (par exemple un héros sera "Out" après trois blessures, un simple NPC sera éliminé après une seule,...). De plus, les malus seront affichés parmi les caractéristiques des personnages ainsi que dans la fenêtre à côté du portrait..

Cependant, afin de laisser un maximum de liberté au MJ, il lui est aussi possible de déclencher l'apparition de ces effets ou de les supprimer en utilisant les boutons de la section suivante, Etats.
Comme vous pouvez voir, il est aussi possible d'attribuer ou d'effacer l'état de choc qui est très utilisé dans Savage Worlds.

Voilà ce à quoi ressemblent graphiquement ces différents états:
Le Out correspond à la mise hors de combat par blessure ou par fatigue pour les héros. Cet état peut aussi être attribué directement par le MJ selon ce qui s'est passé dans son scénario.

La mort correspond à la mise hors de combat des NPCs ordinaires, ou il peut être activé par le MJ pour les héros selon les résultats et les effets des blessures.

L'état de choc peut résulter de nombreuses circonstances dans les règles de Savage Worlds. Il appartient donc au MJ de le gérer.

Les deux boutons suivants, de la catégorie Apparence permettent de gérer le portrait et le pion d'un personnage ou d'un objet.
Pour comprendre leur utilisation, il faut savoir que trois images peuvent être associées à un pion:
-l'image, à savoir le pion tel qu'il apparait sur la carte
-le portrait, qui apparait lorsque le pion est survolé
-un handout, une image qu'on peut faire apparaitre avec des informations supplémentaires (par exemple une lettre ou un objet que porterait le personnage).

Les boutons permettent ici de changer la catégorie de ces images pour obtenir des effets en jeu.

Le premier bouton (Image), permet d'échanger l'image du pion et le portrait.
Ce qui n'a pas trop d'utilité pour des personnages, mais cela me permet d'attribuer deux images à un objet et de passer de l'une à l'autre.
Par exemple, un chariot peut avoir deux images, l'une bâchée et l'autre non, ce qui me permet de cacher ou de découvrir l'intérieur du chariot.

Le second bouton (Portrait) permet d'échanger le portrait et le handout d'un pion. Ce qui permet, par exemple, de faire passer l'apparence d'un personnage d'une vieille dame tranquille à une sorcière grimaçante. Effet garanti.

La série de boutons suivants (Cartes) permet de manipuler des éléments présents sur la carte.

Le premier bouton (O H) permet de faire passer un élément du décor, du calque Objet au calque Caché, ce qui le rend invisible sur l'écran des joueurs, mais toujours visible sur celui du MJ. Ré-appuyer sur le bouton effectue la manipulation inverse.

Le second bouton (PCs) permet de déplacer tous les pions, qui ont été définis comme PCs, de la carte actuelle à une autre carte.

Le troisième bouton (Select) permet de déplacer tous les pions sélectionnés de la carte actuelle à une autre carte.

Les deux pions suivants (Z- et Z+) permettent, lorsque plusieurs éléments de décor se chevauchent, de renvoyer l'élément sélectionné vers l'arrière-plan ou l'avant-plan.
Ce qui permet, par exemple, d'empiler plusieurs étages d'une même structure (les ponts d'un bateau par exemple) et de passer de l'un à l'autre.

La dernière série de boutons permet d'afficher les effets (lumières ou templates) sur la carte.
Le premier de ces boutons (Eclairage) permet d'associer un éclairage à un pion ou un objet, ce qui permet de déterminer la zone qu'il peut voir.
Le second de ces boutons (Effets) permet d'associer à un pion ou un objet un des templates d'effet prévus par les règles du jeu. Ce qui permet, par exemple de déterminer la zone d'effet d'une explosion ou d'un sort.
Le cinquième bouton (X) supprime l'éclairage ou la zone d'effet associé à un pion.

Les bouton Invis et Vis rendent respectivement invisible et visible un pion. Sur l'écran des joueurs le pion disparait (ou ré-apparait); sur l'écran du MJ, le pion se voit attribuer un symbole permettant au MJ de se rendre compte qu'il n'est plus visible pour les joueurs.

Enfin, notez bien que le framework que je fournis ici ne contient que les éléments des règles de base de Savage Worlds.

Pour intégrer un nouvel avantage/handicap/pouvoir provenant d'un supplément ou imaginé par le GM, il faut:

Dans la liste des propriétés:
définir une nouvelle propriété:
exemple: CodeofHonor:0

ajouter à la ligne de la propriété Handicaps ou Avantages ou Pouvoirs:
exemple: [r: if( CodeofHonor>0, " Code d'honneur", "")]

Dans les macros:
dans la macro "Input", ajouter parmi les avantages ou handicaps ou pouvoirs:
exemple: "CodeofHonor|" + CodeofHonor + "|Code d'honneur|CHECK",

Et c'est tout!

Dans les exemples précédents CodeofHonor est le nom de la propriété tel qu'il est utilisé par Maptool et Code d'honneur est le nom qui apparaitra dans les fenêtres des macros et sur la feuille de personnage.
Les avantages, handicaps et compétences des règles de base sont déjà intégrées dans le framework.

Voilà, il ne me reste plus qu'à vous donner le lien pour télécharger le framework.

N'hésitez pas à le bidouiller. C'est un des plaisirs de Maptool. Et si vous avez des questions, je suis prêt à y répondre.