Sunday, 28 April 2013

The (almost) universal, face to face, no input, Maptool framework.


Maptool can be used "out of the box", as a simple whiteboard upon which you can move your game tokens.
But, if you want to make your work as a gamemaster easier, you can automate a lot of things, and, therefore, I developped  a few frameworks, intended to help me (see here or here, for exemple).
But they proved to be much too cumbersome for the way I play.
Using a virtual tabletop is, for me, a way to simplify my preparation and organization of the game sessions, and , whilst quite simple by Maptool frameworks standards, I found that they were still getting too much in the way for my use of Maptool.

Indeed, I use Maptool exclusively to play face to face games, with real players, and not to play online. I use Maptool as a display for my players and to record easily gaming stuff. You'll find a compleat explanation about the setup I use here, but, basically, it is simply a computer with a second screen attached to it.
I quickly realised that I don't need a tool for managing the characters or the NPCs. As we are all gathered with classic character sheets, and I have my scenario containing all the values I need. So, there was no need to record those values in the program beforehand.
The framework is used by the gamemaster (me), so, there is no need for control or validation from the program. Rules don't need to be set in the framework, I know them.

My main objective was to get rid of the need to input values before playing. If the maps and the tokens were present, I wanted to be able to open the framework and begin to play with most games I am using.
The conclusion, was that, in opposition with my earlier frameworks, I was going to record spent points (hit points loss, power spent,...) instead of substracting them from a maximum that I had to input before the session. And, I was to get rid of any automation for calculating levels or special effects when those points were lost. I was going to do it as I do it anyway: by checking my notes.

If you are like me, you probably dust off old games from time to time, or try new ones. Making a new framework each time, or even adapting an old one is too much work for one-off or trial sessions.
So, I decided to make the framework around « generic » stats, in the hope that I would be able to use it with most games I could decide to try.

I decided to just have a few counters for the stats that appear in most games and only record spent or recovered points. That did take away the chore of inputting any maximum (or even any stat) before gaming.

This framework is pre-ready to play with most games I have been using, so, I suppose it should be usable with very few modifications for most games, or even, as a base for a more full-fledged framework.
Maybe you could add one macro or two for very special needs (I am doing it for my Flashing Blades framework that needs a way to record combat maneuvers from the characters). Or you could remove the macros that have no use for your game (the locations of wounds, for exemple, if your game does not use it).

The resulting framework is really lightweight and simplistic, it doesn't do much, but it doesn't take any preparation time and it works, more or less, with every game I have tried upon it. That's what I wanted.

As Maptool frameworks goes, this one is not much to look at, it is not original at all, but it is usable directly in my games without any preliminary work, and for me, that was the priority.

So, here is the Almost Universal Face to Face No Input Maptool Framework for even Game masters that have no Maptool experience.

And here is the PDF explaining how to use it. The framework is a very simple one, so, the explanations have been made with the idea that the reader has almost no knowledge of Maptool. If you have any level of experience with Maptool, you don't really need to read it.

You'll find very useful information for modifying it to your taste (changing the stats names or macros, for exemple), here (read Introduction to Tokens, Introduction to properties and Introduction to Macro Writing and you'll know as much as I do).

If you are an experienced Maptool user, you can safely disregard the framework and the pdf, but I hope it shall prove useful for non power users like me.

Saturday, 6 April 2013

Flashing Blades play aids / Trois Mousquetaires aides de jeu


Flashing Blades is a wonderful roleplaying game for swashbuckler games. Whilst, quite logically, rather elaborate on the fencing rules, Flashing Blades is not a difficult system.
Still, from discussions on the yahoogroup, it appeared that some peoples had problems to master the combats in a fast and dynamic way. The only problem I could see, is that the players have to take into account rules or modifiers printed in different places.
So, here are some summary pages that I place in each player's booklet (A5 size). To resolve an attack, parry,.. the players have to follow what is on the appropriate page. It should make the fights quicker and easier.
This way, a fight shouldn't take longer than a dozen minutes.

Flashing Blades play aid in english

Les Trois Mousquetaires est un jeu de rôles de Cape et d'Epée. Bien que contenant, logiquement, des règles d'escrime assez complètes,  Les Trois Mousquetaires n'est pas un jeu compliqué.
Cependant, lors de discussions sur le yahoogroup, il est apparu que certains avaient des problèmes à maitriser les combats de façon dynamique. Le problème qui m'est apparu, est que les règles et les modificateurs à prendre en compte sont placés à plusieurs endroits dans le livre des règles.
J'ai donc réalisé quelques pages de résumé que je place dans le livret de mes joueurs (format A5). Dès lors, pour résoudre une attaque, une parade,... il suffit de suivre le cheminement repris sur la page appropriée.
Cela devrait rendre les combats plus faciles et plus rapides à gérer.
De cette façon, un combat a peu de chances de prendre plus d'une douzaine de minutes à régler.

Aides de jeu Les Trois Mousquetaires en français


Sunday, 24 June 2012

My Maptool framework for Savage Worlds (english version)

Maptool is a free Virtual Tabletop program. Basically it is a virtual tabletop intended for playing through internet. But it can be something else.

Contrary to what is usually put forward about the program ability to play through the net (and it is also true of other VTTs), Maptool is also (mainly?) a fabulous tool to play in "normal" face to face games with the players gathered around a table (and also to play by forums, but that's for another post).

Maptool is not specifically designed for one particular game (if you use it "out of the box", it is a simple whiteboard upon which you can move your game tokens). It is still possible to adapt Maptool for the game you play, and the way you play it, by developping a framework.

It is the framework that I have developped to play Savage Worlds with my gaming group that I intend to present here. Or, more precisely it is the english version of the framework I use in french.
Maptool can be downloaded here.
You'll find further explanations, ideas or solutions here.

First, I must stress that I use Maptool exclusively to play face to face games, with real players, and not to play online. I use Maptool as a display for my players and to record easily gaming stuff. You'll find a compleat explanation about the setup I use here, but, basically, it is simply a computer with a second screen attached to it.

The framework (meaning all the automated functions I have programmed) is the result of that way to use Maptool; and, a lot of things that could have been added or programmed for gaming online (like dice throws for exemple) are done around the table and are not part of the framework.

If you prefer a more compleat and automated framework, you should download Savage Troll's framework which shall let you use much more features.

Here is what Maptool looks like when using my framework:


As you can see, selecting a token (or even just moving the mouse on it) shows the portrait associated to the token and reveals a small window with a few informations. The informations are going to be different if the token is a PC or a NPC. The map, shown on the right occupies the main part of the screen (you only see a fraction here, it goes further to the right). And there is a column on the left that can display the tokens and maps library or the Campaign Macros, by toggling the tabs at the bottom. It is all we are going to use.

We are going to review all those campaign macros.

Let us see what those controls do.


The first button (Character Sheet) reveals the character sheet associated with a token.


Here is, for exemple, the sheet of the character that was visible above:


The second control (Input) let you fill or modify the character sheet. After clicking the button, you can select different categories and fill or check the fields.

Content should be self explaining.


The next controls (Wounds, Fatigue, Power and Bennies) let you modify the character state by managing the values that can change during the game.


Increasing wounds and fatigue points can trigger the display of some states on the token (for exemple, a wildcard shall be "Out" after three wounds, whilst a non wild card shall be eliminated after just one,...). Moreover, malus from wounds and fatigue shall be displayednear the character's portrait.

But, to give the maximum of freedom to the GM, he can override those states and put them on or off with the next row of controls (States).


Here is what those states look like:


Out means that a wildcard has been put out of the fight through wounds or fatigue. It can also be attributed directly by the GM depending of what happens in the scenario (any reason for which a character, wildcard or not, should be inconscious or unable to take actions).


Death is displayed when a non wildcard character receives a wound. It can be activated by the GM depending on the results of wounds on a wildcard.


The Shaken state can be the result of different things in Savage Worlds. So, it is the GM who must handle it..


Next two controls, from the Appearance category let you play with the portrait, image or handout of a token (or object).
To understand what it is about, you must know that it is possible to associate three images with a token (or an object).
-the image, the token as it appears on the map
-the portrait that appears when you put your mouse on a token
-a handout, an image that you can show to give informations during the game (basically, it is used to show a handout carried by the token, hence the name).

The controls here let you change the category of those images to obtain effects during the game.

The first control of the row (Image), let you exchange the image of a token and its handout image. Not too useful for a character, but it enables you to give two images to an object and change from one to the other. For exemple, you can have a lorry with an outside image and an inside one showing its contents. The two images must have the same size.
The second control (Portrait) let you exchange the portrait and the handout of a token. It lets you change a character from a charming old lady into an horrible ghoul. Your players will love that. The two portraits must have the same size.

Next row of controls (Maps) let you manipulate the elements on the map.
Before anything else, always check the layer you are on, before selecting, moving or manipulating anything on the map. It shall save you a lot of frustating moments.


First control (O H) let the GM move a selected feature from the layer Objects to the layer Hidden, which makes it invisible to the players, but still visible to the GM. Doing it again shall make the reverse operation (from Hidden to Objects).

The second control (PCs) let the GM move all the tokens that are tagged as PCs, from the current map to another map.
Third control (Select) let the GM move all the selected tokens from the current map to another map.
The last two controls (Z- et Z+) enable you to change the position of elements stacked together and that are sometimes difficult to select or drag because they cover each others.
It also gives you the possibility to stack different parts of a structure (the decks of a ship for exemple) and go from one to the other.


The last row lets you associate some effects (lights or areas) to tokens on the map.
The first one (Areas) let you associate a template to a character or an object. Mostly useful for area effects like explosions.
The Lighting button lets you associate à kind of light to a character (you can see the torchlight effect above).
The X control removes the lights and areas associated with a token.


-Invisible-Players view-


-Invisible-GM view-

Controls Invis et Vis make a token respectively invisible or visible. On the player's screen the token disappear (or re-appear); on the GM's screen, the token receives a small mark (see above) to show the GM that the token is not visible to the PCs.

Finally, it is important to note that only the edges/hindrances/powers of the Savage Worlds Explorer's Edition are integrated in the framework.
So, if you must add edges/hindrances/powers from supplements or from your own worlds, you must add the new edge/hindrance/power
If, for exemple, you want to add something called Code of Honor, you must:

In the properties list:
- declare the new property:
exemple: CodeofHonor:0

- add it to the line of edges or hindrances or powers
exemple: [r: if( CodeofHonor>0, " Code of Honor", "")]

In the macros:
in the macro "Input", you must add it among the edges or hindrances or powers:
exemple: "CodeofHonor|" + CodeofHonor + "|Code of honor|CHECK",

That's all, you don't even have to understand how it works if you do it correctly (it should be entered as the others elements of the same category).
In the exemples above CodeofHonor is the name that Maptool shall use and Code of Honor is the name as it shall appear on the macros windows and on the character sheet.

Now, I just need to give you the link to the framework. Just open it in Maptool and you are ready.

Don't hesitate to change anything you want in the framework. Experiment. It is one of the pleasures of Maptool. And if you have any question, please ask, either here or on a forum.


Tuesday, 15 May 2012

Maptool sketches

I hope that I was able to convince you to give a try at Maptool for your roleplaying face to face sessions, but maybe you are asking yourself what to do next?
Maybe you would like to make yourself some stuff for your game but don't know what exactly, or how?

Here is an idea for you.

We all want our maps and tokens to be as evocative as possible. But it is very easy to get carried away, spending more time working on the display than on the adventure.

Must every map looks like a part of Baldur's gate or Dragon Age? Is it even useful?
There is nothing wrong with that, of course, but, just as you can love many drawing styles, surely we can play on different graphic styles.
Not because it is simpler, or easier, or faster to do (though it is). But because it gives a different feel to a game. A great feeling of retrogaming.

There is a certain, undeniable charm to sketched maps on squared paper. Some very talented bloggers have made a speciality of it and they succeed handsomely at what they do.
To make you better understand what I am speaking about, I recommend that you have a look at Dyson's Dodecahedron blog, Matt Jackson's Lapsus Calumni (don't forget to download the Lapsus Calumni zine) or, for city maps Brandon Kruse's D&D doodle. For me, their maps convey the very flavor and character of true roleplaying.

Of course, in the past, all the maps you would find in a scenario were black & white maps. But, as the hobby grew from a bunch of enthusiasts into a small industry, the quality improved and some of those maps, while still simple b&w drawings, were very well made and very artistically drawn. When enlarged some of them make quite evocative displays on their own.

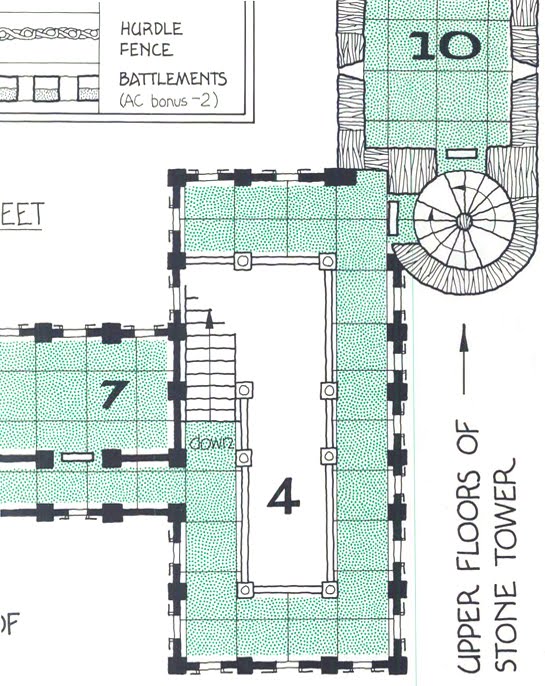
Here is for exemple a part of a map from Night's Dark Terror. This one
was intended as a battleboard, so no enlargement was necessary. It is
easy to imagine using it directly in Maptool.
I would certainly recommend the catalyst's citybooks collection from Flying Buffalo. First, because after a quick scan, they can be made into playing maps (and with adventures attached to them) but mostly, because they can be used as inspiration for your own maps. Their key symbols are easy to draw yourself, well thought out and self explaining; perfect for use in mapping your own places (for exemple, I have used, since their release, the convention of having a number of lines on a furniture showing the number of drawers).

Because sketched maps are generally smaller than detailed ones, and because the floorplans you can make from them are not going to be overdetailed, the scale for Maptool should be smaller than what is usually used (or at least what I usually use). Let's use 50 pixels for a 5' square, for exemple.

If the maps you intend to use or draw don't have a grid upon them, you can add one easily. It shall break the large white areas and give a sense of proportion for the players.

Here is a tilable grid of 50 pixels squares that can be added to any b&w map. You can use it as a tilable texture or turn it into a pattern. Just fill a layer with it and set its blending mode to multiply. It should make the squares visibles whilst staying quite unobstrusive.
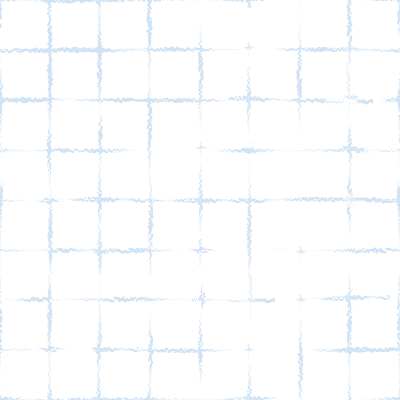
You can also use this pattern as a background in Maptool. It would make your maps blend better on it and it would help you sketching directly with Maptool's drawing tools when needed.

Now, the next step is to make some tokens in a style adapted for this kind of maps.
You can't draw? Fine, it is not needed.
Don't be shy. Anything goes as long as it is recognisable by the players. Even a blob or a cross should do the trick, if the players know that the blob is Krornar the barbarian and, that the cross is Hudo the mighty, magician extraordinary.
So here are a few ideas of the kind of doodles that could be turned into tokens. Nothing fancy as you can see:
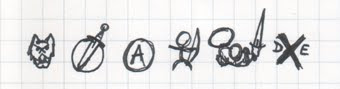
The trick here, is to use the same things you would be using for marking the position of a character on a map, and turn it into a movable mark.
I'll use the overhead view as exemple, but all the other styles would work as well (don't forget that Maptool can show a token orientation by a small arrow if your doodle is not intended to rotate).

But now, how do you turn those doodles into a sketched token? (with Photoshop, but as always, it should work as well with GIMP or other programs if you prefer).
That's quite easy indeed.

Scan your doodle (here at 300 dpi) and open it in your graphic program.
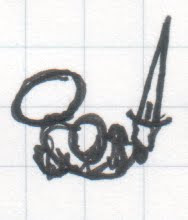
Clean your scan by enhancing the contrast contrast and eventually setting a white and a black point (depending on the model, your scanner can maybe have done it already).
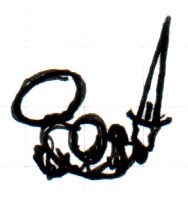
Make sure that your drawing is not on a background layer (if it is, double-click the background layer to turn it into a normal layer).
Select the white area around your drawing. As your token is going to move over a mostly white map, you don't have to come too close to the drawing, there is no problem if there is a small white zone around the token. Erase the white area you have selected. Your drawing should now be surrounded by transparent pixels.
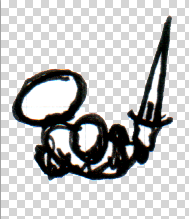
Resize so that the "body" fills more or less a 50px area. To do that, it can help to set the grid of Photoshop to 50 pixels, which means that each square you see now on the grid shall correspond to a square on your map.
Trim the transparent zone (Menu-Image-Trim-Transparent)
Because the maps you are going to use have black lines, it could be better to color slightly the lines of your tokens, so they stand out better when playing, but it is not mandatory.
Go to Menu-Image-Adjustement-Hue/Saturation-Check the button Colorize-Increase lightly the lightness control and move the Saturation and Hue controls until you are happy with the result.
Menu-Save for Web and Devices-Choose png24 and that's it, it can be used on your maps.
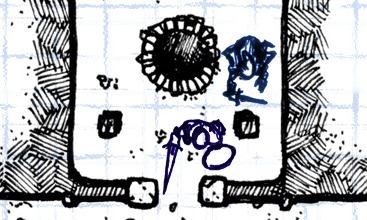
The result is not very detailed, but remember that they are only doodles (well, moving doodles) drawn on a squared paper map to show positions.

If you use portraits with Maptool, I think that the best option is to try to find some old school b&w illustrations to use, there are lots of them on the internet (for a beautiful exemple, have a look at Russ Nicholson blog). But that depends on your tastes.

The good news when using this kind of tokens and this style of maps, is that it opens a lot of new possiblities for finding already made maps available on internet.
For exemple, the modern floorplans from Fabled Environments (there is a free one, if you want to check), make a very extensive collection of modern places, quite difficult to find otherwise (MSPE gamemasters, this is for you).
You can also make a search on Google for floorplans restricting it to large images, you'll be quite surprised by what you can find that way.
And, don't forget, if you are into SF, to have a look at all the deck plans that were ever made for traveller.

But basically, your best resources for playing maps are the maps in the scenarios you own (if you have old magazines, Dungeon or White Dwarf for exemple, you have a mine to exploit); or, even more importantly, a notepad of squared paper and your scanner. The main idea in this blog post is that you can turn your own work into usable Maptool components.

Finally, I would like to stress that the trick I gave for turning a 3D vehicle from the Sketchup warehouse into a vehicle token works as well in B&W. The only difference is that before exporting from Sketchup, you should change the style to a B&W one in the Styles window (there are some drawing styles that come with the program that should work very well; and there are others available on the net).
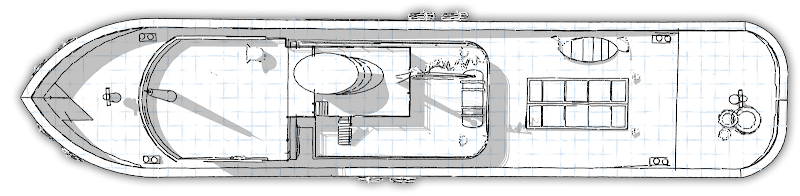
Of course, in this case, resize to 50 pixels per square. Here is a ship, for exemple.

-click on the image to view full-size-
You could also, of course, color the maps. Given the style of the drawings, a flat coloring should work better than heavily textured colors or paintings using shadows and lights. That should be fast and easy.

If you are talented, you could even try to go further and render your maps in a style more like those of old Games Workshop's floorplans collection.
If you like that kind of maps (and I certainly do), you should give a look at those made by the very talented Billiam Babble, who has been able to capture the feel of them (Billiam is also the author of the b&w maps in "The Shadowed Keep on the Borderland" that would work wonderfully for the kind of games I am speaking about here).

But I am disgressing, so let's go back to our simpler maps.

To end this post, I think that the best thing to do is give you a small Maptool campaign file, to let you have a try.
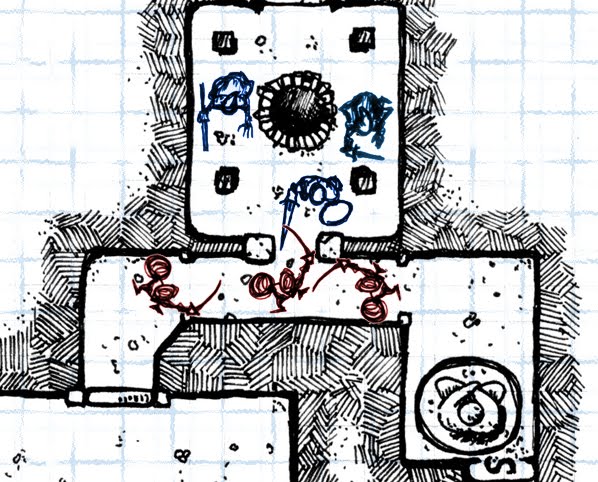

So here is the MAPTOOL MINI DUNGEON OF DOODLED DOOM:
The characters are about entering an old shrine where wood-dwellers (a kind of goblins) are hiding. But unknown to even the dwellers, there is an old tomb hidden by a secret door, and who knows what treasures lies beyond?
I have NOT entered stats for either the PCs or NPCs. So, there is still a little work for the GM, but I preferred to give an empty "scenario" (if so small a dungeon can be called a scenario) to let you design its contents (stats, traps, treasures,...).

It contains a map, the tokens and the associated portraits. Just add a story, some stats and play (the framework is my Tunnels & Trolls framework, but you can import another into it, if you prefer). If you don't use Maptool, you can still use the different elements: change the file extension to .zip, open it and you'll have access to its contents (map, tokens, illustrations,..).
If you don't have the Tunnels & Trolls rules, but would like to try the scenario with the associated framework, there is an introductory Tunnels & Trolls free rulebook with all that you need to play this mini dungeon.

This kind of stuff is certainly appropriate for any Old School gaming session.

When I say Old School, I don't only mean the retroclones of D&D, though there are a lot of them, but also the other games available to play in old style.

This kind of dungeon should be perfect for Tunnels & Trolls, but also Swordbearer, ZeFRS or Dragon Warriors among others (I am only mentionning those games I know and which are still sold).
This wouldn't work as well with narrative style games, which, after all, don't need maps, characters or even players, if you think of it.

As you'll be able to experiment for yourself, the big fun with this kind of maps, is that you can, not only, doodle your maps but also really play directly on them. And have your doodles tokens crawl all over the map, instead of just marking the place where the monster is lurking.
That, in itself is a very real pleasure. And it is possible to have a usable result, wathever your skill (or lack thereof) at drawing can be.

Still, wathever you decide to use, always remember that it is not the map that is going to make a game session memorable or not. When the players are gripped in the suspense of their alternate life, when they are no more just players sitting around the table, nobody cares about what is used to display a tactical situation, as long as the situation is displayed clearly in an understandable way. A tactical display shall always beat a simple description, but there is no reason why it should be graphically elaborate.

So, first of all, have fun.


Saturday, 5 May 2012

Maptool framework for "Mercenaries, Spies & Private Eyes" and "Tunnels & Trolls"

Maptool is a free Virtual Tabletop program. Basically it is a virtual tabletop intended for playing through internet. But it can be something else.

Contrary to what is usually put forward about the program ability to play through the net (and it is also true of other VTTs), Maptool is also (mainly?) a fabulous tool to play in "normal" face to face games with the players gathered around a table (and also to play by forums, but that's for another post).

Maptool is not specifically designed for one particular game (if you use it "out of the box", it is a simple whiteboard upon which you can move your game tokens). It is still possible to adapt Maptool for the game you play, and the way you play it, by developping a framework.
It is the framework that I have developped to play Mercenaries, Spies & Private Eyes with my gaming group that I intend to present here. I have also added elements specific to Tunnels & Trolls (5.5 ed) such as Monster Ratings or T&T talents. Which means that the framework can be used with both games.
Maptool can be downloaded here.
You'll find further explanations, ideas or solutions here..

First, I must stress that I use Maptool exclusively to play face to face games, with real players, and not to play online. I use Maptool as a display for my players and to record easily gaming stuff. You'll find a compleat explanation about the setup I use here, but, basically, it is simply a computer with a second screen attached to it.

The framework (meaning all the automated functions I have programmed) is the result of that way to use Maptool; and, a lot of things that could have been added or programmed for gaming online (like dice throws for exemple) are done around the table and are not part of the framework.

Here is what Maptool looks like when using my framework (the map is a scan of my old Games Workshop Halls of Horror floorplans set):

As you can see, selecting a token (or even just moving the mouse on it) shows the portrait associated to the token and reveals a small window with a few informations. The informations are going to be different if the token is a PC, a NPC or a MR monster. The map, shown on the right occupies the main part of the screen (you only see a fraction here, it goes further to the right). And there is a column on the left that can display the tokens and maps library or the Campaign Macros, by toggling the tabs at the bottom.
We are going to review all those campaign macros.

Let us see what those controls do.

The first button (Character Sheet) reveals the character sheet associated with a token (if he has a character sheet, MR monsters have not).
Here is, for exemple, the sheet of the private eyes that was visible above:


The second row of controls (Input Character Sheet) let you fill or change the contents of the character sheet.
Caution: if you choose MR and gives a Monster Rating to a token, the controls Skills, Spells, Stats and the Character Sheet becomes inactive, because MR monsters don't need them. To have them active again, you must give the token a MR of 0.
The other controls will open windows where you can input the values of the character.


The three following sets contols (Wounds, MR+, MR-, Healing, Strength and Power) let you modify stats that can vary through the game, either up or down. MR+ and MR- are for Monster Rating tokens.

Diminishing CON or the STR of a character can toggle a "Out" or "Dead" state that shall appear on the token.


But, to give the maximum of freedom to the GM, he can override those states and put them on or off with the next row of controls (States).
Here is what those states look like:
Out means that the character is unable to make something (either from passing out, or from non lethal combat, or....wathever), but is not dead.

Dead means, of course, that the character is, well, dead.


Next two controls, from the Appearance category let you play with the portrait, image or handout of a token, or an object.
To understand what it is about, you must know that it is possible to associate three images with a token (or anobject).
-the image, the token as it appears on the map
-the portrait that appears when you put your mouse on a token
- a handout, an image that you can show to give informations during the game (basically, it is used to show a handout carried by the token, hence the name).

The controls here let you change the category of those images to obtain effects during the game.

The first control of the row (Image), let you exchange the image of a token and its handout image. Not too useful for a character, but it enables you to give two images to an object and change from one to the other. For exemple, you can have a lorry with an outside image and an inside one showing its contents. The two images must have the same size.
The second control (Portrait) let you exchange the portrait and the handout of a token. It lets you change a character from a charming old lady into an horrible ghoul. Your players will love that. The two portraits must have the same size.


Next row of controls (Maps) let you manipulate the elements on the map.
Before anything else, always check the layer you are on before selecting, moving or manipulating anything on the map. It shall save you a lot of frustations.

First control (O H) let the GM move a selected feature from the layer Objects to the layer Hidden, which makes it invisible to the players, but still visible to the GM. Doing it again shall make the reverse operation (fromHidden to Objects).

The second control (PCs) let the GM move all the tokens that are tagged as PCs, from the current map to another map.
Third control (Select) let the GM move all the selected tokens from the current map to another map.
The last two controls (Z- et Z+) enable you to change the position of elements stacked together and that are sometimes difficult to select or drag because they cover each others.
It also gives you the possibility to stack different parts of a structure (the decks of a ship for exemple) and go from one to the other.


The last row lets you associate some effects (lights or areas) to tokens on the map.
The first one (Areas) let you associate a template to a character or an object. Mostly useful for area effects like explosions.
The Lighting button lets you associate à kind of light to a character (you can see the torchlight effect above).
The X control removes the lights and areas associated with a token.

-Invisible-Players view-

-Invisible-GM view-


Controls Invis et Vis make a token respectively invisible or visible. On the player's screen the token disappear (or re-appear); on the GM's screen, the token receives a small mark (see above) to show the GM that the token is not visible to the PCs.

That's it, I just need to give you the link to the framework. Just open it in Maptool and you are ready.

Don't hesitate to change anything you want in the framework. Experiment. It is one of the pleasures of Maptool. And if you have any question, please ask, either here or on a forum.